I’m starting my first Farbenmix pattern, Laura, and after looking up different German sewing translations, I sat down with my husband, MJP, to put his German skills to use.
This is what we have come up with (please take with a grain of salt, as his German is at the self professed ’12 year old’ level, and didn’t include very much in the way of sewing instructions!). I took some poetic license when sewing the hood to the dress as I thought this method finished the hood in the nicest way. I also considered using the method shown in this tutorial, from the Ottobre site, which finishes the seam with grosgrain ribbon. The Ottobre tutorial is a good reference, as well, for how to construct a hooded sweatshirt, or dress.
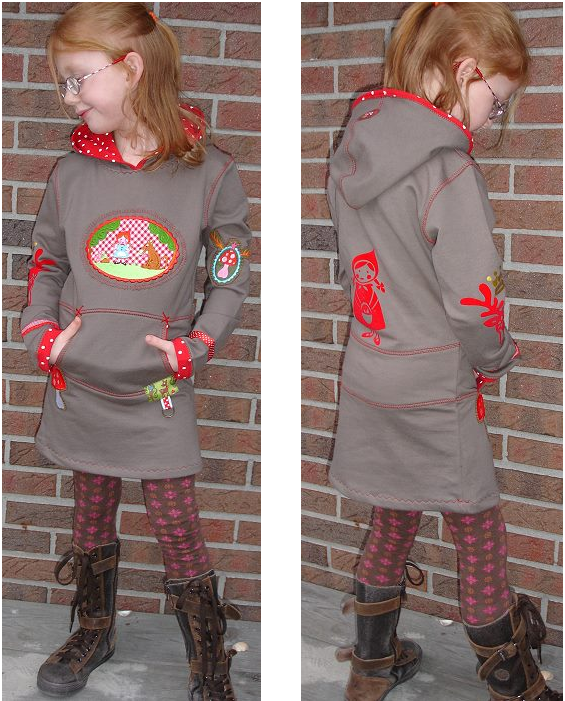
Farbenmix Laura Pattern
The sweater dress is cut short narrow, sitting on the hips (hüftig) and is easy to wear over leggings, jeans or colorful tights.
It is made from slightly stretchy fabrics (such as sweatshirt, elastic/flexible velveteen fabric, thicker or thinner fleece Jersey) and is adapted quite slim. Therefore, width and length are adjusted before cutting. The dress should be sewn with a slightly elastic stitch, such as narrow long zigzag stitch. Also use a stretchable stitch, such as the twin needle stretch stitch, to top stitch the seams flat.
Larger Frames
LAURA dress is a slim fit. For larger frames, it is necessary to go up one size, then shorten the length a bit. Selecting a lighter, very stretchable fabrics such as jersey, interlock or not too heavy elastic/flexible velveteen fabric (Nicky in German), to offer more freedom of movement, is also recommend.
Step by Step Instructions
(these steps correspond to each of the 9 pictures shown on the German step by step instructions)
- Cutting Instructions: Cut out all pattern pieces with additional seam allowance added. Pocket and hood can be sewn doubled, in this case cut out in each of hood and lining. Alternatively, ribbing can be attached to pockets, cuffs and hood edge. In this case, cut the relevant length of of ribbing for each piece accordingly. If you choose to sew the dress without the separate mid section, just before cutting, lay the corresponding pattern pieces together, and cut as one piece.
- In the doubled version of the pockets, lay with right sides together and stitch the side edges. With the doubled version of the hood, stitch the two hood pieces along the crown fabric right sides together, for both the hood and the lining. Place the hood and lining, right sides together and sew the front edge. Turn outward and topstitch along the edge.
- For the pocket part turn and topstitch the side edges. Center the pocket part on the front center section insert, and stitch across the seam allowance.
- Sew the center section inserts of the front and back of the dress, right sides together, first to the upper sections, and then to the lower sections. Secure the pocket corners with narrow zigzag tacks at each of the four corners.
- Align front and back shoulder seams, right sides together and stitch. Finger press the seams towards the back of the dress, and topstitch flat.
- With right side of hood lining to wrong side of dress, center the back lining of the hood on back center of the dress neckline and pin within the seam allowance. Align the front corners of the lining of the on the front center of the dress neckline, overlapping the two edges slightly, pinning within the seam allowance. Sew the hood lining to the dress. Fold the seam allowance of the outer hood under and topstitch all around the outside.
- For the sleeves, align with right sides together and sew. Finger press the seam toward the dress, and topstitch the seam flat.
- With right sides together, sew underarm and side seams in one continuous seam. Hem sleeves with lining fabric or ribbed fabric as desired.
- Hem dress with zigzag or twin needle topstitch.


. Will definitely be ready for next Christmas though!")


{ 0 comments… add one now }
You must log in to post a comment.