A few weeks ago, I finished the mobile quilts for Meredith and Nolan. The original pattern didn’t call for mitered corners, however, when I chose the striped Kaffe Fassett fabric, I decided it would look much nicer.One downside to mitered corners, is that they use more fabric and you will need to cut 4 strips slightly larger than the finished size of the block you are completing. In my example, I made them 1/2 ” larger.
Disclaimer: I tend to balance accuracy with the need to finish a project within a reasonable time frame (in between snack / meal requirements of my girls). There are likely more accurate ways of creating mitered corners on blocks, but this one works for me : ).
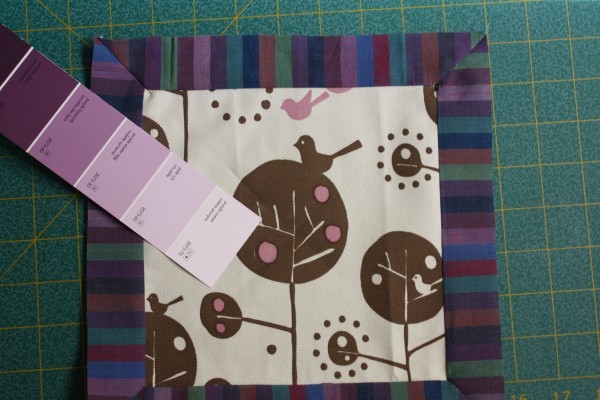
Step 1 is to secure the top and bottom strips to the inner block. Take time to center the strips perfectly on the block, to ensure that you will have enough fabric hanging over the edge of the block to make the mitered corned. Start to sew 1/4″ (or the seam width) away from the edge and stop 1/4″ from the edge of the block.

Step 2 Finger press each of the seams up. I do this because I find that with narrow strips of fabric, it’s easy to stretch or distort the border if you press with an iron.
 Step3 Sew the adjacent borders to the sides of the block, ensuring that you will have enough fabric hanging over the edge of the block to make the mitered corned and starting to sew 1/4″ (or the seam width) away from the edge and stopping 1/4″ from the edge of the block.

Step 4: Finger press the mitered corner line, by folding the edge overlap to form a corner at the edge of the pressed border. The finger pressing creates your stitching line for the next step.

 Step 5: Finger press the remaining corners on the side borders (4 in total, 2 on each end of the unpressed side borders)

Step 6: Fold the entire block in half, down the 45 degree angle extending from your finger press line. Pin and then sew along the press line. You can double check the accuracy of your seam line by lining up a ruler on the 45 degree fold line with your new seam line. Trim the seam allowance to 1/4 “.


Step 7: Complete the remaining corners and trim the allowance.

Step 8: Lightly press your block with an iron and admire your lovely mitered corners!


. Will definitely be ready for next Christmas though!")


{ 0 comments… add one now }
You must log in to post a comment.